We celebrated Kalia's 1st birthday with a garden gnomes and fairies theme.
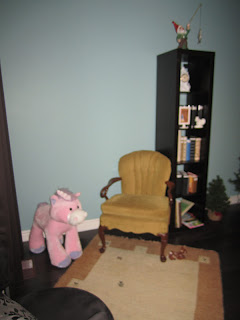
Here she is on her beloved unicorn she got for Christmas this year.
Decor
I reused the fork and knife holders from Kali's baptism.I just hot glued the ruffled streamers I made out of plastic table clothes around a formula tin. Viola! (Tutorial on ruffled streamer here)
No need to take the Christmas tree down just yet --I just added a few woodland animals poking out.
Loved the idea of spay painting pine-cones -look how cute mine turned out!
These flowers were from Kalia's Baptism. And check out what they are in! Baby food jars covered with a balloon. Found the tutorial here.
A motion-sensor owl by the bathroom sink caught our guest off guard with it's moving eyes and hooting!
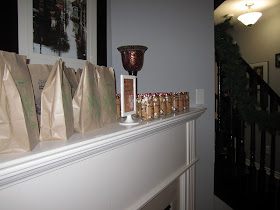
I took some cute fairy loot bags my mom found at the dollar store, folded them over a ribbon and stapled them --it made two cute banners! Great idea if you're having trouble finding things in your theme.
Activities and Games
We set up a Tattoo Station. The cute $1 double-sided frames from Ikea were perfect for this, as I put the instructions on one side. The clip art I got from here and I used a wood-grain drawer liner for the background.
The area for caricatures -we made sure there was plenty of room behind the artist so that guests could watch.
To keep all the pictures in great shape while our guests mingled and ate, we set out clothes pins so they could hang them up!
I just left our Christmas garland up on the staircase to make the gallery!
This kept all the pictures in great shape but it also was fun for guests to look at and see if they could name everyone in the pictures.
We did Put the Flower in Tinkerbell's hand! I was going to come up with some sort of homemade version but I ran out of time. Surprisingly this game was most popular with Logan and Jacob...who took like ten turns each until all the flower stickers were gone.
Gnome bowling was a huge hit! My tutorial is here.
The kids got the gnomes as trophies after and freaked out when they lifted the hats to find candy and a wind-up toy


And lots of cuddles and socializing for Kalia! And check out her cute ladybug costume I dressed her up in!
Food and Drink
I used the most of those gnome printouts!
Love this container! My grandmother made it...I think it's suppose to be a plant pot holder so something but I put a bowl inside and it was perfect for popcorn!
I just hot glued the gnomes on toothpicks and stuck them into my homemade cupcakes
Kalia ate that cupcake sooo fast!
The Favours
The s'more mix in the cute mushroom jars were a hit -and very easy and cheap to make. My tutorial is here.
Kalia loved all the tissue paper more than the presents!
Happy 1st Birthday, Kali! We love you!


